Friday, 27 June 2014

Signalex Bluetooth Driver Download (Poundland)

FILE DOWNLOAD IS AT THE BOTTOM OF THIS POST.

I recently purchased a Signalex USB Bluetooth dongle from Poundland for - you guessed it - just £1. Windows automatically picks up the dongle and installs basic drivers which only allow for discovering devices, pairing, and sending/receiving files.

I had purchased the dongle because my new sofa has a built-in media bay and Bluetooth speakers. Since I have a media center PC, I wanted to be able to remote control that PC and output the sound direct to the sofa speakers via Bluetooth. The built-in drivers did not allow for this as I required the A2DP Bluetooth profile.

After three hours of searching the most obscure places on the internet, and trawling through numerous forums where I could only find incompatible drivers or dead links, I struck gold. My HTPC now plays sound through to my sofa, and I can play/pause/rewind and volume control the PC from the buttons on my armrest. Sweet!

I always like to post my finds so that people can get easier access, so I have created an entire driver bundle for the Signalex devices, combining all the files and information I obtained from the internet, to enable all the features.

Bundle includes:

  • Filter driver, if your dongle was not automatically detected
  • A2DP Profile (Advanced Audio Distribution)
  • AVRCP Profile (Audio/Video Remote Control)
  • DUN Profile (Dial-up Networking)
  • FTP Profile (File Transfer)
  • HID Profile (Human Interface Device)
  • HSP Profile (Headset)
  • LAN Profile (LAN/Networking Access)
  • OBEX Profile (Object Exchange / Legacy File Transfer)
  • PAN Profile (Personal Area Network)

... which is pretty much everything you would want to do with one of these cheap devices. Note that they aren't the fastest thing in the world - file transfer is painfully slow for example - but what do you expect from such a cheap device? This isn't Bluetooth 4.0 :)

Includes 32 and 64 bit drivers compatible with Windows XP, Windows Server 2003, Windows Vista, Windows 7, Windows Server 2008, and Windows 8.

Direct link here: http://www.crayden-group.co.uk/signalex_csr_bluetooth.zip
SHA256: 1b6749b0d1cd14490428ca9d2900086837bba5f62bfc737f8975be5805a1813c

Please feel free to share and mirror this file. It would be great if you could link to this page rather than the file direct as the link could change at any time :)

-----

UPDATE 29/.09/2015:
The latest version of Google Chrome is suggesting that this file is "not commonly downloaded" and therefore may be dangerous. These are just warnings and are not virus detections, you can still download the file by choosing "allow" instead of "discard". There is nothing to worry about.

I have included the SHA256 hash under the link above and also ran both the URL and the contents of the file through VirusTotal to prove that the download is safe and genuine.

https://www.virustotal.com/en/url/ade61d666a07c97754f8af184398d4045393392571b13d02abde73682deb317d/analysis/1443515260/

https://www.virustotal.com/en/file/1b6749b0d1cd14490428ca9d2900086837bba5f62bfc737f8975be5805a1813c/analysis/1443515266/

Sunday, 9 September 2012

Toshiba L300 wireless card replacement issues

Yet another post about the terrible Toshiba L3xx series of laptop - this time regarding the problems I encountered when trying to replace the internal PCI-Express Wireless (WLAN) card and how I overcame them.

This model (well, mine at least) ships by default with a Realtek RTL8187B card. This is an awful card, for many reasons which I will not go in to.

I wanted to upgrade this card to one that supported Wireless N. There were 2 reasons for this:

1. The internal card had receiving issues after a period of time, and;
2. My router supports Wireless N and I wanted to make full use of it.

I purchased a basic card from eBay - it was a generic unbranded card, which appeared to be about £3 cheaper than some of the other "branded" ones. At the end of the day, the reliability of the card is determined by the chipset used, and mine used a RALink chip, so I was content with that.

The problems started occuring however when I tried to replace the card. Firstly, the L300 would not POST with the new card at all. The fan was spinning, all lights were on, but nobody was at home. I realized that I had a very early generation Toshiba which had a BIOS whitelist for the WLAN card, preventing me from using anything other than the original. I got around this by putting the original card back in and updating the BIOS to the latest version - this removed the whitelist (I suppose Toshiba had a change of heart).

Despite this, all was not well. The laptop would now POST and boot in to Windows with my replacement card fitted, but it was simply not detected. Cutting a long story short, the reason is...


The Toshiba L3XX series of laptop does not fully implement the PCI-Express specification.


To be exact, Toshiba had been really tight here and have only actually provided the circuitry to use a PCI-Express card that has USB functionality! 

PCI-Express has 4 pins which can be used to provide a simple USB port. Power, Gnd, TX and RX. The original card provided by Toshiba was simply a USB Wireless Dongle in PCI-Express form factor!

Looking closer at the motherboard you can see that only 6 lines have traces on the PCI-Express connector. I believe that 4 of them are for USB, and the other 2 are used for toggling the wireless on/off using the front chassis switch.

This is appalling. I later purchased a ridiculously cheap, very nasty Wireless N card which only had the USB functionality of it and did not rely on the rest of the PCI-Express specification. This worked first time and after installing the drivers I am now writing this post using Wireless N on my new WLAN card! :)

The moral of the story?
The Toshiba L300 is a "put it together as cheaply as you can" jobbie - in other words, it is a nasty piece of crap which is not even suitable to be part of the budget laptop market.

Tuesday, 20 March 2012

Galaxy Note ADB drivers without Samsung Kies

Further to my previous post here: http://liamcrayden.blogspot.co.uk/2012/02/samsung-galaxy-note-n7000-adb-usb.html

I am most disgusted at having to install Samsung Kies just to have the drivers available for my Samsung Galaxy Note. When connecting my phone to a system without Kies, even if I just want to use it as a mass storage device, I have to repeatedly click through dialog boxes to get rid of drivers that Windows can't find.

CDC Serial
SAMSUNG_Android
ADB etc etc.

Installing Samsung Kies does indeed install these drivers and get rid of those driver installation prompts every time I plug in my phone, but its also over 200MB in size (and thats just the compressed download!) and is full of bloatware which seriously impacts the performance and startup time of my PC.

For those of you in my position, here are the drivers that you need. You can use these without Kies.

FOR ADVANCED USERS (install these through Device Manager manually) 4MB: http://www.crayden-group.co.uk/secure/galaxy_note_drivers.zip
UPDATE 27/06/2014: New link here - http://www.purplerooster.co.uk/galaxy_note_drivers.zip
UPDATE 29/09/2015: New link here - http://www.crayden-group.co.uk/galaxy_note_drivers.zip

 FOR ALL OTHER USERS (includes a simple install wizard) 23MB: http://secure.tinyserve.com/SAMSUNG_USB_Driver_for_Mobile_Phones.exe
UPDATE 27/06/2014: This file is no longer available. Please use the above link instead.

If these have helped you, please comment below or +1 this page so that others can find them too. Also please do not directly link to the above files. Help me spread the word across all your favourite forums and blogs by spreading the link to this blog post please.

Sunday, 5 February 2012

Samsung Galaxy Note (N7000) ADB / USB Drivers

I am in the business of software development, and it really annoyed me to discover that in order to use my new Samsung Galaxy note as a development device I had to download a ~200MB file from the Samsung website and install several hundred megabytes of bloatware called 'Samsung Kies'.

All I am interested in is the USB drivers which will allow me to connect to my phone to develop android applications. Some people also need these files if they want to root their device. As Samsung Kies is IMO a piece of junk, I have seperated out the USB driver package and present it here as a single, unmodified, 23MB download for both 32 and 64 bit Windows systems. Note that the package actually includes several drivers for various Samsung phones, hence the (larger than necessary) file size.

Click here for Samsung Galaxy Note N7000 ADB / USB Drivers
UPDATE 27/06/2014: Link is now dead :( See my newer post for an updated link and method here: http://liamcrayden.blogspot.co.uk/2012/03/galaxy-note-adb-drivers-without-samsung.html

Please comment or +1 if these drivers were of any help to you. If I get round to it in the near future I will post the Galaxy-only drivers instead which should be approx 300KB instead of 23MB! Enjoy (and dont waste your valuable time and bandwidth downloading the Kies software ever again)

Thursday, 30 September 2010

Toshiba L300 Series Continuous Faulty Hard Disk Drive

"I have absolutely no doubt that something causes drives fitted in Toshiba L300 series laptops to fail almost out of the box."

Recently I have been keeping a record of the Toshiba L300 series laptops that have come through my hands for repair purposes. Over the last 6 months I have seen a total of 27 L300 series laptops, 25 of them having the same fault - a faulty hard disk drive - and the remaining 2 having basic issues such as broken screens or keyboards. This equates to an average of 4 laptops (of the same make and model series) per month having the same issue.

The drive supplied from the factory is a standard 120GB SATA drive manufactured by Toshiba Storage Co., so there's nothing unusual about that, and if a hard disk drive is faulty then you simply replace it right? This is what I had thought, but it seems to be a little trickier than that.

I have tried fitting every make of 160GB SATA drive that I can lay my hands on. Hitachi, Western Digital, Samsung, MDT and Seagate. All these drives failed again within 48 hours. I use 3 different branded enterprise-ready diagnostic testing software packages and all 3 fail the drive on READ, WRITE and SMART EXTENDED tests.

At first I thought it was the drives I had been using, so I changed brand. To rule out a faulty batch of drives (and a heavy-handed postman) I even changed supplier. I tried 4 different suppliers and 5 brands of drive in total. The MDT drive I expected to fail anyway - they are just refurbished drives from other manufacturers sold as new with a slightly less capacity - but for all these drives to fail from all these different suppliers did not make sense. I even checked that they from different batches and tried to mix old and new stock to give an accurate result.

I find it extremely rare that these drives would fail within a 48 hour period, and consistently produce the same result. Keep in mind that this is over a 6 month period too.

I considered the possibility that my diagnostic software wasn't compatible with the controller, or that there were other factors that could be affecting the test result. With this in mind I tried testing the drives BEFORE and AFTER in another machine with a known consistently accurate test result. Before the drives were fitted inside the laptops they were fine, and after they were re-tested 48 hours later they had failed. This now ruled out incompatible software running on the test Toshiba machine.

The drives were literally unusable in other machines and even as USB storage devices when housed in top-brand USB enclosures. They clicked, clunked and sometimes even power cycled for no apparent reason. I have absolutely no doubt that something causes drives fitted in Toshiba L300 series laptops to fail almost out of the box.

As a second experiment I purchased a brand new Toshiba Satellite L300 and gave it to a friend to use as any regular person would for exactly 30 days. I tested the drive immediately after opening the box and it passed all tests without even a sign of potential failure. After 1 month I re-tested the drive. The drive failed the SMART EXTENDED test, but passed the READ and WRITE tests. It did not click or power-cycle.

I'm not really sure what to conclude from this. It would appear that something (and I wouldn't even like to attempt to guess) causes drives to fail when being used in this model/series of laptop. This appears to affect all lines, including Satellite and Equium. To make matters worse I had also started looking at Toshiba Satellite 405D laptops and these are starting to show signs of the same thing. It's too early to say for certain, but I wanted to bring this into the public light and see if anybody responded with any comments on their own experience on these.

As of now I have stopped fitting new drives into any Toshiba L3xx and L4xx series laptops as I cannot deal with the amount of warranty returns and extra workload that this introduces. I would like to point out that Toshiba as a manufacturer are generally pretty reliable and will obviously resolve any issues that you have under warranty within the first year of purchase. I deal with several hundred laptops a month and no other make, model or series presents the problem for me.

Sunday, 20 June 2010

Fix Blue Screen Stop Error 0x00000023


For an explanation on the cause, a simple fix, and how to prevent blue screens with STOP error message 0x00000023, please see my other post based on error 0x00000024. These errors are essentially the same, the only difference being that 24 is the code for NTFS file systems, and 23 is the code for FAT32 file systems.

See more: http://liamcrayden.blogspot.com/2010/06/fix-blue-screen-stop-error-0x00000021.html

Saturday, 19 June 2010

Fix Blue Screen Stop Error 0x00000024

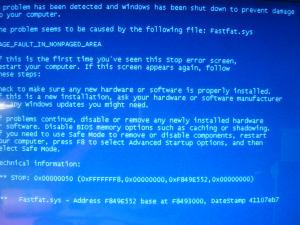
I woke up this morning to the delightful sight of a Blue Screen of Death - similar to the one shown on the left - preventing Windows from starting on my laptop. As I work in the IT industry this was not a problem for me, and within a couple of minutes I had been back up and running again.

Computer Technicians see this type of problem over and over again, but I had to ask myself how many of those could explain:

a) Why the problem with the blue screen occurred, and;
b) How to prevent the problem from re-occuring.

In my particular case I had a blue screen that was easy to decipher. The majority of blue screens often contain valuable information that can help the user identify the problem and begin to rectify the fault. A good starting point is to note down the seemingly meaningless numbers after the word "STOP", and search the internet for it's "average joe humanly-worded definition" - I imagine that's probably how you ended up here.

Depending on the way your computer is configured, you may or may not be able to see the error message quick enough because your computer restarts too quick for you to be able to read it. This is due to you (or your computers manufacturer) specifying an option to "automatically restart on system failure". This is not too much of a problem however, as there is an easy override option:

  1. Turn on your computer, removing all floppy disks, CD-ROMs and USB Flash Drives. This will ensure we are booting from the hard disk drive.

  2. Just before the Windows loading screen, keep tapping the F8 key on your keyboard. If the Windows XP logo is displayed, you're too late! Try again.

  3. You are now presented with a menu containing options including "Safe Mode", "Start Windows Normally" and more.

  4. Using the arrow keys on your keyboard to scroll down to "Disable automatic restart" and hit ENTER.

You will now be able to see all the details from the blue screen, and your computer will not restart. There are many different error codes that can be shown, and they each have their own individual meanings (and of course, fixes, which can be applied).

Returning to the main point of this post, I would like to concentrate on the exact STOP code that had been presented to me this morning. STOP: 0x00000024. Before I give you the fix, let me take this chance to explain exactly what has happened here, and how we can prevent this in the future.

The code 0x00000024 tells me that I have some sort of NTFS file system corruption. I know this from experience, but if you Google the code you will likely come up with similar explanations. These words probably still mean nothing to you, so let me explain in a clearer manner;

NTFS - this is the "file system" that my hard disk drive uses, and the easiest way to visualize this is to think of it as a way of organizing files and folders on your computer. Imagine you have a filing cabinet containing your recent bank statements, household bills and other important paper documents. You have likely separated these in to categories in your cabinet, so that you can easily pick them out when you need to find them. This is your own "method" of organizing, and NTFS is basically a method of organizing the structure of files, folders and security on your computer. For background information, there are many other types of file system including FAT32 (which can also be used with Windows XP but is more commonly found in previous versions such as Windows 98 and ME).

Corruption - you can get corruption when something went wrong, or did not complete fully for whatever reason. You can think of corruption as incomplete or garbled information. Imagine you have a bank statement in your filing cabinet, but for some reason you do not have the bottom half of the piece of paper. That bank statement is now incomplete, and is therefore not very useful.

Your computer needs specific information in order to start Windows. For example, it needs to know how to operate certain features of your hardware, and it needs to know what settings you prefer on your desktop. Without these vital pieces of information your computer cannot start because it simply would not know what to do or how to proceed.

We are receiving the blue screen error message with code 0x00000024 because the computer has identified a problem with a file, set of files, or the way in which files are organized, on the hard disk drive.

Why did this happen?

You can often realize the cause of a computer problem simply by thinking back to what you were doing before the issue occurred. In my case it was completely my fault that I received this error message and I only have myself to blame.

Late last night I had been happily working away on a personal project on my laptop. Time got on, and I began to get tired so I decided to call it a night and go to bed. The laptop had been taking a while to shut down and I got impatient, so I switched it off at the mains without letting Windows shut down fully. BAM! This was the cause.

The Windows shut down sequence is actually very critical, and it's there for a reason. While you have been using your computer, you have been opening files, saving and retrieving information, and adjusting settings. Even if you were only browsing the internet, you have still committed to some type of hard disk drive activity. The Windows shut down process closes any files that were still open. It saves any important contents in the RAM (the working memory) to disk. It saves any personal settings or preferences that you have made.

By interrupting the shut down process, you have accidentally caused "file corruption". Windows had been in the middle of saving your information but you stopped in half way. It now does not have all the information it needs to get started again, and the result is our blue screen problem.

Imagine you are writing a novel, when suddenly your publisher storms in, snatches the paper you are working on, and tears it in half. The information on that page is no longer complete, and the novel is ruined until you can replace that information. This is similar to what has happened with our computer issue.

It is worth noting that you cannot always cause an error message or problem by simply turning off your computer without letting it shut down properly. It is purely down to timing, and whether Windows has saved the information that it needs to get going again.


Fixing the problem

Now that we know why the problem exists, we can get to work on fixing it. Luckily for us, there are several utilities that exist which will help us here, and most of them are free. For this article we will use a Microsoft utility called CHKDSK. It's name quite literally explains what it does, it "checks the (hard)disk".

We cannot access our computer to run this utility, so we need some other means of starting the program. The easiest way of doing this is to use the Microsoft Recovery Console, which you can find on a Windows XP installation/setup CD-ROM. You likely have one of these already - they are usually gold in colour and have a holographic top side - but if you don't, you will almost definitely have a friend that can lend you a copy. Obtain or locate your Windows XP CD-ROM, and follow the instructions below;

  1. Turn on your computer and insert the Windows XP CD into your CD/DVD-ROM drive. Remove any floppy disks or USB Flash Drives.

  2. Configure your computer to boot from the CD drive first, before the hard disk drive. There are several ways to do this. The easiest method is to look at your screen when you first turn on your computer. Messages such as "Press F12 to enter Boot Menu", "ESC to enter boot device selection" or similar are your best bet. Pressing the key that is highlighted in that error message will hopefully present you with a menu that will allow you to choose the CD drive. If you get this far, simply select the CD and skip to step 4 below. If you do not, follow the instructions below in step 3.

  3. THIS STEP IS ONLY FOR USERS THAT DO NOT HAVE A BOOT MENU OPTION ON THEIR SYSTEM AND NEED TO ENTER THE BIOS. CHECK THE PREVIOUS STEP TO SEE IF YOU NEED THESE INSTRUCTIONS. You will need to enter your BIOS to change the boot device sequence. By this, we mean that we want to tell the computer where to look, and in what order, to attempt to start things from. The key to enter the BIOS is different on many systems, but usually you will find it by tapping the F2, F10 or DELETE key on your keyboard when your computer starts up. If you are successful, you will be presented with a menu full of weird and wonderful options. If you cannot get this far, refer to your computer or motherboard manufacturer instruction manual for details on how to enter the BIOS setup.

    Once you have entered the BIOS, we need to change the boot order. Again, this is different in many computers and the exact method varies, so this is difficult to explain. In short, you need to look for an option that relates to "First Boot Device", "Boot Device Priority" or "Boot Device Order". You may need to use the left and right arrow keys on the keyboard to locate this option. Once you have found it, set the "first" device to your CD or DVD drive, and the second device to your hard disk drive. When complete, exit the BIOS by pressing the ESC key on your keyboard, and saving the changes when prompted. Your computer will now restart.

  4. Your computer will now begin loading files from the Windows XP CD-ROM. If you see a message saying "press any key to start from CD...", then hit any key on the keyboard. You will be presented with a blue screen containing the words "Windows Setup" near the top left, and a grey coloured information bar at the very bottom of the screen. Give it a few minutes, and you will be presented with a message saying "Welcome to Windows Setup".

  5. Ignore the message, and press the R key on your keyboard. This will start the recovery console, which will appear on a black screen with white writing. Leave it to do it's thing, and you'll eventually be asked which Windows installation you want to use. At this point, press the number "1" key on your keyboard. If you are asked for a password, simply enter your normal Windows password. If this does not work, try pressing ENTER to skip the password prompt.

  6. Assuming we entered the correct password, we are now in a working environment and can finally start the CHKDSK program. To do this, simply type "CHKDSK C: /P" (without the quotes), sit back and relax. The CHKDSK program is now checking your hard disk drive for problems, and is fixing anything that it finds. When its complete, you'll be told of it's status.

  7. For luck, and mainly down to the results of my personal experience, it is always best to run the CHKDSK program again. Simply type "CHKDSK C: /P" again (without the quotes) and let it run for a second time. When complete, you'll be told of it's state once more.

  8. We're done! Type the word "EXIT" (without the quotes) and your computer will now restart. Remove the Windows XP CD from the CD-ROM drive. Providing that the only problem with your computer was the "STOP: 0x00000024" error, you should now find yourself back in your computer and can continue working again. The problem is now resolved.

Thats right, there's no joke. By putting in a CD-ROM and typing 3 words we have fixed our problem. The CHKDSK program has located any bad information that it has found and has corrected those problems. I will not go in to detail as to how this program works, but all you need to know is that it is very powerful and often a life saver for many computer users.

So, how can we prevent this from happening in the future?


Honestly, we just need to be more careful. No matter how long it takes, and no matter how tempted you are, you should NEVER switch off your computer without correctly shutting it down. If you have a laptop, NEVER let the battery run out completely before shutting down - this is just the same as switching it off! Always allow the computer to shut down correctly, even if it takes a few minutes to complete.

You should also seriously consider another possibility that the problem may be down to faulty hardware, namely a faulty hard disk drive. It is absolutely possible that you have been shutting down your computer correctly, yet you have still resulted in this error message. If you are getting the error frequently then this may be a sign that your hard disk drive is failing.

Hard disk drives are fragile mechanical components, and can wear with age. They are very sensitive to knocks, drops and bumps, so be particularly careful when handling a laptop, and do not kick or hit your desktop computer out of frustration if it is taking too long to process something.

In any case you should always back up all of your personal data once you have fixed the problem with your blue screen error message. There are many local computer shops which will offer a free diagnostic test on your hard disk drive if you take your computer to them, and it might be worth the trip just to be sure. If your drive is found to be failing then you should replace it immediately.

I can't recommend any particular companies, however the best repair outfit by far in my area (Portsmouth, Hampshire, UK) is PC Ideals in Southsea. They're on the main Albert Road, and will always be there to help.

On a final note, I want to mention that changing settings in the BIOS can be dangerous if you do not know what you are doing, and can stop your computer from booting if you play with options that you are not familiar with. I cannot be held responsible if you let your imagination go wild and end up with a completely non-functioning computer.